
Preparation of Bases
(tried for a long time for a clever title, Preparation B, Prep Base, Before Basic, but I just couldn’t get there)
A long time ago I talked about the Basics of Basing, where I talked about… the basics of basing. There were two things to that article that I was trying to tell you: You are trying to tell a story, attempting verisimilitude on the miniature scale, that isn’t the same 1 to 1 of reality AND a whole bunch on the various materials you can use.
Today we are going to talk about how to prepare and create bases
Step 1: Wash
Step 2: Clean up
Step 3: Apply ‘base’
Step 4: Walk the dog
Step 5: Sealing
Wash


You have just won the legendary Cheeto-covered controller, after using said controller are you going to wash your hands before going off to handle and paint your miniatures? But why?
I have worked in a few plastics factories, and that to the right of you if you are on the desktop is machine grease. Looks delicious, doesn’t it… Not really, we use it liberally that is what is coating your miniatures and ESPECIALLY your bases. Bases can be mass-produced and will be, and they will be done in the most efficient way possible. Giving your base a wash in warm soapy water will give you a better chance of adhering paint and glue to it.
Clean up!


As I said, bases are the most callously mass-produced of all miniatures so they will have some worst mould lines and protruding parts. Cut those bits off and sand them down don’t put too much work in. The base is just the frame for your model. Don’t worry too much.
Apply Base

Okay so this the most variable of all of the steps because here it really depends on what you are working with. Are you doing a Scottish highland base? Lava Lake? Elven Estate? Haunted House? Realistic Rubble?!
Put, Paint or Place
Whatever you want on the base!
There are literally millions of different ways you can base but the actual application of it, is when you put all the elements together. The general rule is to start with your biggest stuff first and then after that go progressively down in size. This is where all the materials go together and usually, there is a sand and PVA stage.
Handy hint if you are going to be mixing rocks and more than one variety of sand, mix it all together in PVA and add craft paint to it now so you don’t have to prime it as that colour will be added, you can add some water if it gets too thick. Also because it is basing material you don’t have to use your fancy miniature paints some craft paint will help bind the colour and help bind it to the base. I mix all of my material in a plastic shot glasses with a paddle pop stick (they call them craft sticks now apparently) and then I scoop it out with said stick and apply it. This is when I force my particularly big rocks in place. If you use this technique the rocks/sand will naturally fall into place because of gravity. Best part… you don’t have to do the final step because this will seal in everything.
Walk the Dog
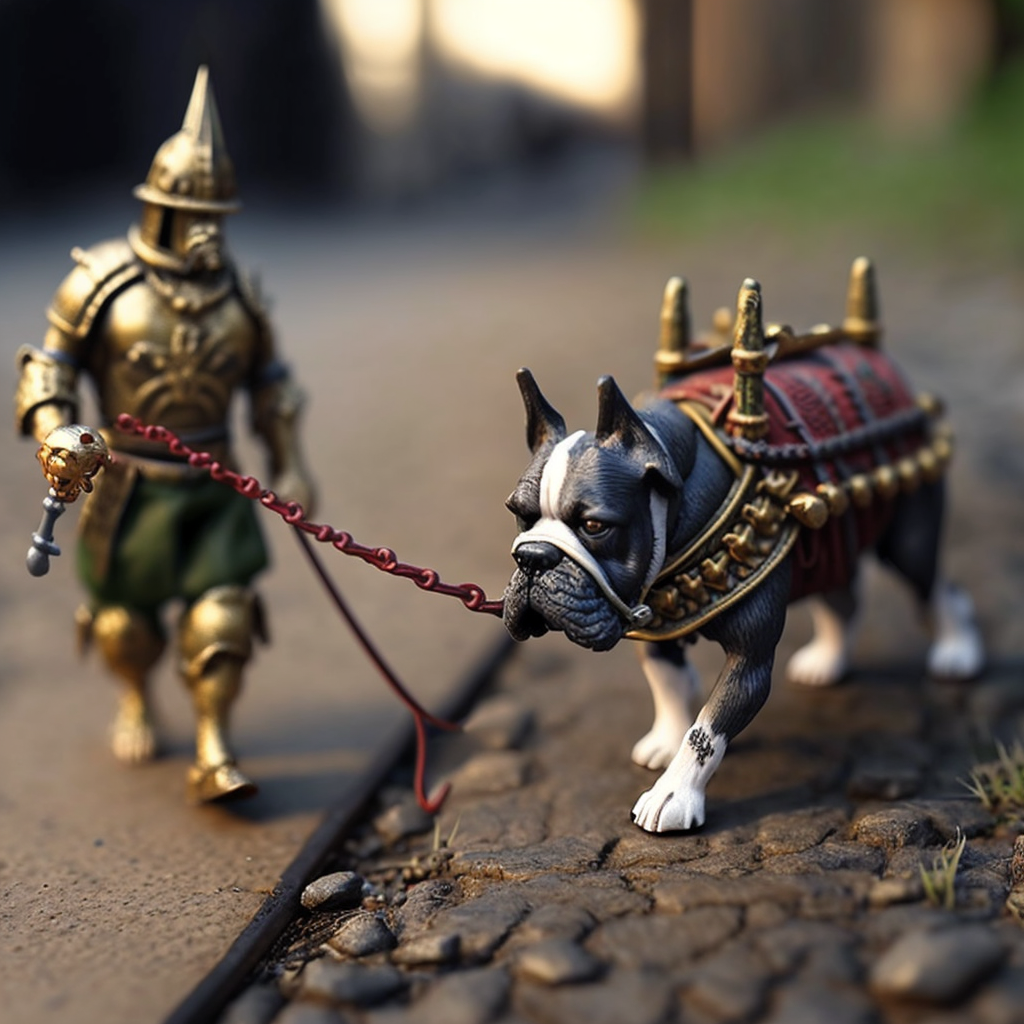
Some people would call this step ‘Dry Fitting’ (I will explain this later on) and sometimes it is dry fitting but in this case it’s not so… Let’s talk about my favourite thing again…
verisimilitude
/ˌvɛrɪsɪˈmɪlɪtjuːd/
noun
the appearance of being true or real.
"the detail gives the novel some verisimilitude"
A lot of models when they are put onto bases, especially if they are pinned on… they have a bad habit of hovering on the bases. And not in a cool magical kind of way but more in a, wait what, immersion-breaking way. This is why people should dry-fit their model to the base.
dry fitting refers to the practice of assembling the parts of a miniature model or terrain piece without actually glueing them together. This allows the hobbyist to test the fit of the parts and make any necessary adjustments before committing to a permanent assembly with glue. The idea behind dry fitting is to ensure that the finished product will have a smooth and seamless appearance, free of gaps or misaligned parts. By performing a dry fit, the hobbyist can also check for any potential issues with the parts, such as warping or deformations, before they become a problem in the final assembly.
This concept is no different for the base except…
That verisimilitude I was talking about earlier. Here is the issue the Adeptus Astartes, the Space Marines are seven to ten feet tall (2.14 meters to 3 meters) and in their power armour they weigh just under a metric ton.
This leads me to believe that must be some unobtainium, adamantine, rockcrete, plasteel level gravel and grass. Here is the thing everyone can buy into the idea of Superman but everyone has trouble with the idea of no one recognising that he is Clark Kent. You can avoid this Clark Kent conundrum by doing one thing.
Walking the Dog
Get your miniature and when you are applying the wet material, so this is when you are applying sand, static grass, or the slurry from before. Wait until the glue is a little tacky (this technique usually works best with PVA) and then ‘dry fit’ the miniature on the wet base and then have him (or her or it or whatever) walk to that dry fit area, while wet, wet fitting. This is best done when your miniature is not painted, just assembled.
This gives a bit of a more realistic look and adds some…
verisimilitude
We are pattern recognition machines, in fact we even find patterns where they don’t exist so even if you don’t 100 per cent nail it. People will be extremely impressed with the level of detail you went to, for not much extra effort at all.
Sealing

No not that kind of seal…
Sealing refers to the process of applying a protective coating to the surface of a miniature or model OR in this case base to protect it from damage and to preserve its appearance. The coating can be applied using a brush or spray, and the material used can be anything from a clear varnish to resin. The type of sealant used depends on the material of the miniature, the painting medium used, and the desired final finish. It also protects the paint from chipping, cracking, or fading over time.
In terms of bases often it’s just another coat of PVA glue thinned down sometimes even thinned with alcohol to make it super thin. Some people use hair spray to keep their static grass in place.
For me, and this is a personal thing, once that final bit of glue is dried I find that fiddling especially with static grass, clump foliage/foam flock or railway grass that trying to seal it only ends in disaster and discolouration. Sand, rocks, and other such types of things I think are fine to seal but usually I do it in the stage I mentioned before.
Conclusion
I hope this has been helpful and I hope this is a reference you can use in the future. Until next time.
Keep those brushes wet!